Friday, December 7, 2012

Creative Expressions Club

It has happened, the Geisler Art Room has morphed into a room of creative endeavors and creative expressions. Last week Thursday we had our first Creative Expressions Meeting and then last night we reconvened for another wonderful night of creativity. We will be meeting every Thursday from 3-4 to have fun, snacks, and lots of artistic activities. This week we created cards for soldiers and veterans which we will be sending to the Walter Reed Army Medical Center as well as troops overseas. Some of students began making large paper snowflakes and other students participated in chime choir.

Feel free to join us for more fun next week.


Friday, November 16, 2012

Fall Fun - 6th Grade

6th grade students started this project off by reading the following poems. Students were asked to sit quietly with their eyes closed and think about what images did the poem bring to their thoughts. They then quietly wrote down 10 images that came to mind, we then discussed them as a class, there was no wrong answer however some students suddenly were talking about things like Chucky and Twilight which led to vampires and Taylor Lautner. These weren't necessarily wrong answers but definitely out in left field. As a class we brought the discussion back to the poems and how could we create a picture that represented them.


HALLOWEEN by Richard Anderson
A gentle breeze rustling the dry cornstalks.
A sound is heard, a goblin walks.
A harvest moon suffers a black cat's cry.
Oh' do the witches fly!
Bonfire catches a pumpkins gleam.
Rejoice, it's Halloween!

THEME IN YELLOW by Carl Sandburg

I SPOT the hills
With yellow balls in autumn.
I light the prairie cornfields
Orange and tawny gold clusters
And I am called pumpkins.
On the last of October
When dusk is fallen
Children join hands
And circle round me
Singing ghost songs
And love to the harvest moon;
I am a jack-o'-lantern
With terrible teeth
And the children know
I am fooling.

Students began the art portion of the project by sketching out a design and then drawing that design on a piece of black paper in pencil. Students then traced their pencil lines in white glue as carefully as possible. After the glue lines dried they colored in all of our spaces with chalk making sure to focus on value and blending. As part of this project the students were learning how to use chalks but also how to blend colors to make interesting shadows and highlights. Before turning in the project we sneaked outside and sprayed down the artwork with hairspray to keep the chalk from dusting off. I'm pretty impressed with their work and can't wait to do another one using a poem from Robert Frost.


Students were graded on the following requirements:
    - Create a scene that properly demonstrates the poem
    - Create Contrast through the use of value
    - Neatly use chalk to color image
    - Glue used in a neat manner
    - CRAFTSMANSHIP


Thursday, November 15, 2012

Chuck Close Portraits: As we work - 8th Grade

We have been working away on many different projects in the art room.  We have so much going on and as one of my students stated I "am running around the room busy all the time." Each grade has been working on some really cool assignments and after a good morning working with the other art teachers in the district I am able to say that I have some really fun ideas for future projects.

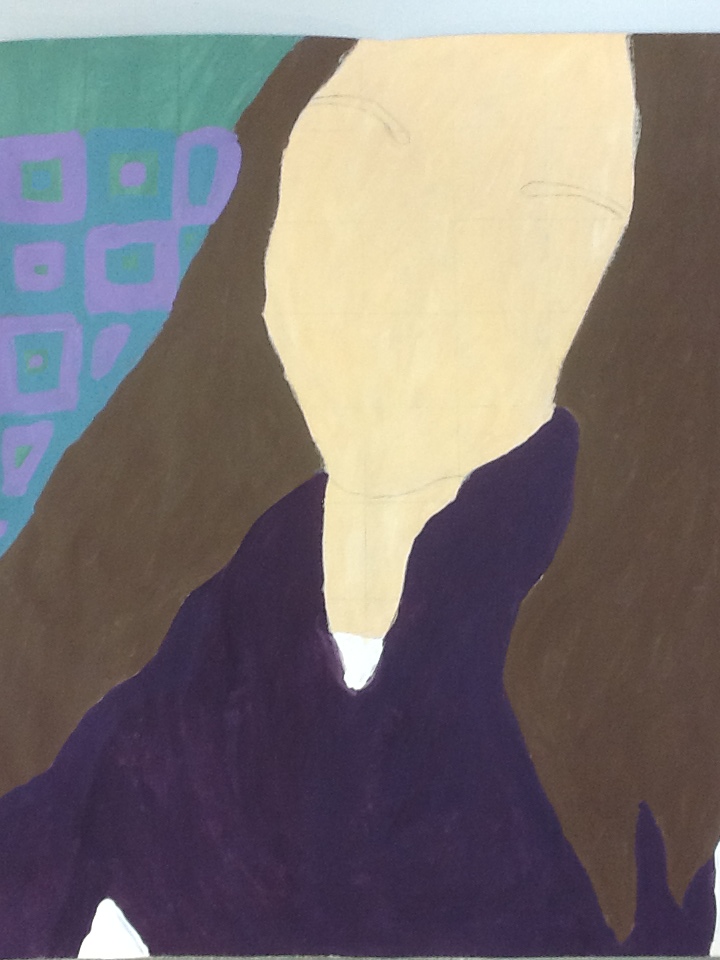
Right now, 8th grade is making large portraits using the process of Chuck Close, we used a grid to draw our images on to the paper. We then began adding in the facial features, this always seems to be the most difficult process and many students are struggling with it but as you can see they are coming along beautifully. Some students have begun to add in the details that are so unique to Chuck Close. Initially we were going to add them to the entire portrait but because the students were doing such a beautiful job with their painting we decided to only add in the shapes and designs into the background.


Students will be graded on the following requirements:
   - Using the grid system to create a portrait that is in proportion
   - Maintaining the look of the grid through the use of Chuck Close's shapes/patterns
   - Blend colors and values to create shadows
   - Layer colors in the shapes in the background to create interest
   - CRAFTSMANSHIP (Clean and Neat Painting)


___ ___ ___ ___ ___ ___ ___ ___ ___ __** Update **____ ____ ____ ___ ___ ___ ___ ___ ___ ___

The students worked so hard on their portraits and they turned out amazing I am so proud of what they have accomplished. Here are the images finished.


Tuesday, October 30, 2012

Spooky Mummies - 8th grade

Obviously, I am playing catch up and posting a ton of things at once but I really want to display the amazing things that my students are creating. This was one of those projects that I was really thrilled at how great many of the projects turned out despite some of the struggles that we had.


A mummy who loves to read!
First, I recommend creating this project using 16 gauge wire and not wire hangers. I started out trying to use wire hangers and ended up struggling to even bend the hangers. Luckily the tech teacher came to my distress and pulled out some unused electrical wire which we tore apart and used the wire inside. In an effort to save some money I ran out and bought a 250 foot roll of 18 gauge electrical wire and tore it apart with the students (which they loved). The wire was used for the armatures we then wrapped the mummies with everything from fabric to old t-shirts, to old bed sheets (the bed sheets work the best, but the t-shirts don't look too bad). The hardest thing to wrap was the head and we found that easiest way was to first stuff the head with newspaper and then wrap with cloth. After wrapping their mummy and securing the last piece of fabric students then bent their mummies into an active pose and added a prop if necessary.


The students were graded on the following criteria:
     - Mummies demonstrate the principle of balance (they don't fall over)
     - Mummies demonstrate the principle of proportion (arms and legs are the appropriate lengths)
     - Mummies are posed in an active stance
     - Bandages are wrapped neatly
     - Bandages create weight (mummies don't look like stick people)
     - CRAFTSMANSHIP

Op Art - 8th Grade

8th grade students looked at the optical illusions of Victor Vasarely and then discussed how optical illusions are created. From this we looked at the op art project from Art with Mr. E.


Students were graded using the following criteria:
     - Create an illusion by bending, turning and re-sizing at least 8 tubes
     - Use Value throughout by shading each tube to look 3-D
     - Use up to 4 colors
     - Fill the page, no negative space
     - Outline each tube with black marker
     - CRAFTSMANSHIP (make it neatly)

Light Reflecting Designs - 7th

Students started by drawing a 2x2 inch grid with a 1/4 inch gap between each square on a sheet of paper. We then practiced different designs and observed how the light created interesting shadows from the shapes that were cut out.


Students were graded on the following criteria:
     - Create a final design that repeats and alternates
     - Final design is 12 images on a grid
     - Create 2 original motifs
     - Images are cut and bent back neatly
     - Backing paper is glued to the proper side of the paper and done so neatly

Monday, October 29, 2012

Please help the art room

PLEASE HELP THE ART ROOM!

I am looking for all of these wonderful things and more. 

With the seasons changing to a cooler climate Kleenex's are necessary but unfortunately the district does not provide these for the classroom any more. If you are able to to provide a few boxes i would be much appreciative.

I am also looking for some parent volunteers who can help me hang up artwork.

Thanks!
Kelly Tillman 


African Masks - 6th Grade

After looking at Art from Africa my 6th grade students created these African Masks. These designs were created using construction paper that was cut and flipped to create mirror images.


Students were graded using the following criteria:
              - The design needed to include all facial features (eyes, nose, mouth, etc)
              - Designs needed to be stylized
              - Final image needed to be a mirror image
              - Each feature needed to have multiple shapes and layers
              - The students needed to have a high level of CRAFTSMANSHIP
                          + Pieces needed to be cut out neatly
                          + Pieces needed to be glued down neatly
                          + The whole picture space needed to be filled.